Five years ago, the popular rotary tool company Dremel released its first 3D printer, the Idea Builder (model
3D20). It was the first major launch of a 3D printer from a company that didn’t specialize in 3D printing. Recently, Dremel unleashed a new family of 3D printers: the 3D45 and the 3D40 Flex. They’re both single extruder and have a larger build volume of 10” x 6” x 6.7”. The 3D45 can print several materials while the 3D40 Flex is optimized for PLA only. Dremel was kind enough to send us a 3D40 Flex to review, so let’s get to it.
| Reliability | |
| User friendliness | |
| Print quality | |
| Print consistency | |
| Range of materials | |
| Support / helpdesk | |
| Slicer software | |
| Availability replacement parts |
Unboxing & setup
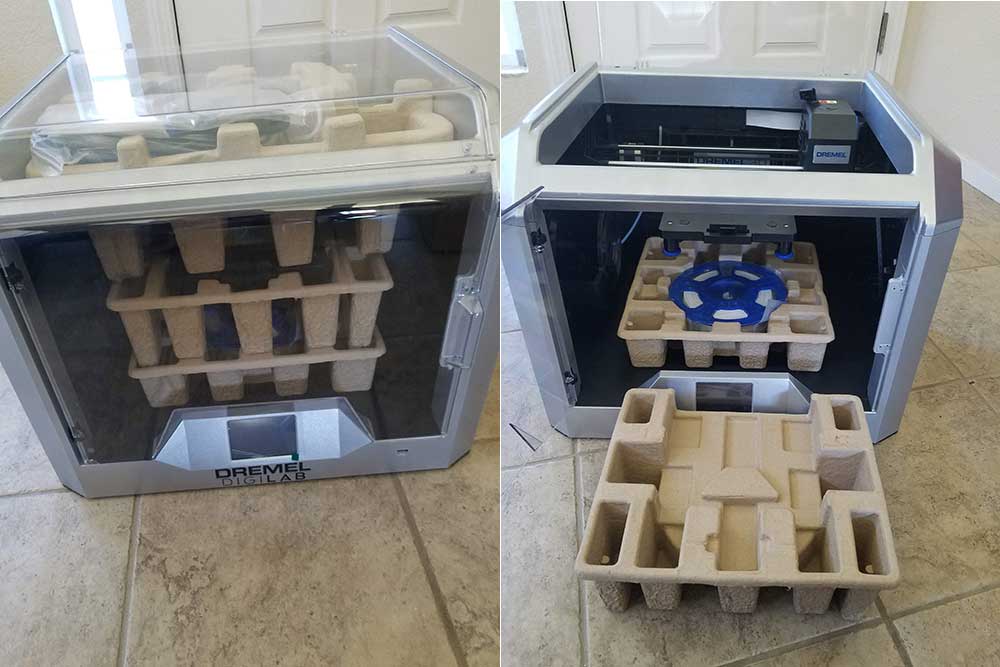
Packaging may seem trivial but it was a real problem in the early days of desktop 3D printers as many arrived damaged from poor packaging. The 3D40 Flex is very well packaged; as it’s entirely box-shaped, it comes with only a few custom inserts, mostly to hold everything in place within the build chamber.

It’s rather light so it’s easy to lift out, and removing the inserts did not break them, which is especially relevant here as I’ll be returning this printer after the review. The blue tape was a bit cumbersome but not a big deal.
Everything seems well put together and sturdy. I like the decision to use a ribbon cable on the extruder, and the flexible (where it gets its namesake), magnetic bed is a wonderfully convenient feature that’s well designed; we’ll cover it more later. I was eager to get printing so I immediately got it into my office.
I’ve worked with paper printers that took longer to set up than this 3D printer. It comes FULLY assembled and the only steps to get going include loading the filament and leveling the bed. The filament spool is loaded into the left side where the filament is fed through a guide tube before reaching the extruder; the touchscreen prompts users when to insert the filament into the top of the extruder and it takes it from there. For leveling, the touchscreen also guides users through the process, which involves turning each of the two knobs below the bed until it prompts to stop. I then installed the included slicing software onto my computer and connected the printer to my wifi. The last step is optional as files can be moved to the printer via the included USB drive, but this is 2019. Why go three feet across my office when I can instantly send a 3D file through the air?
What’s in the box
- USB Flash Drive (with slicing software and a few 3D models)
- Nozzle unclog device
- Extra bed liner
- 1x filament spool
- User manual
- Quick start guide
- Power cable
- USB cable
- Object removal scraper
- DigiLab 3D40 Flex 3D Printer
The First Print
For the first print, I wanted to simulate how a certain type of potential customer might use the printer: someone who has little-to-no 3D printing experience or knowledge but has high expectations. So I loaded up Benchy, a standard torture test, and sliced it with the standard High Quality (0.1mm/100 micron layers) profile without even looking at the parameters/settings and sent it to the printer. To my amazement, the printer initiated its nine-point self-leveling process (it does this before every print and takes only a couple minutes) and then started printing. From the unboxing to the beginning of the print, perhaps 15 minutes had past. This was, by far, the fastest, easiest, most straightforward 3D printer setup I’ve personally experienced.
The default settings included supports, which are not necessary for the Benchy model. After easily removing the bed from the machine and bending the plate slightly, the part popped right off. And then after some difficulty removing most of the supports, this was the result:
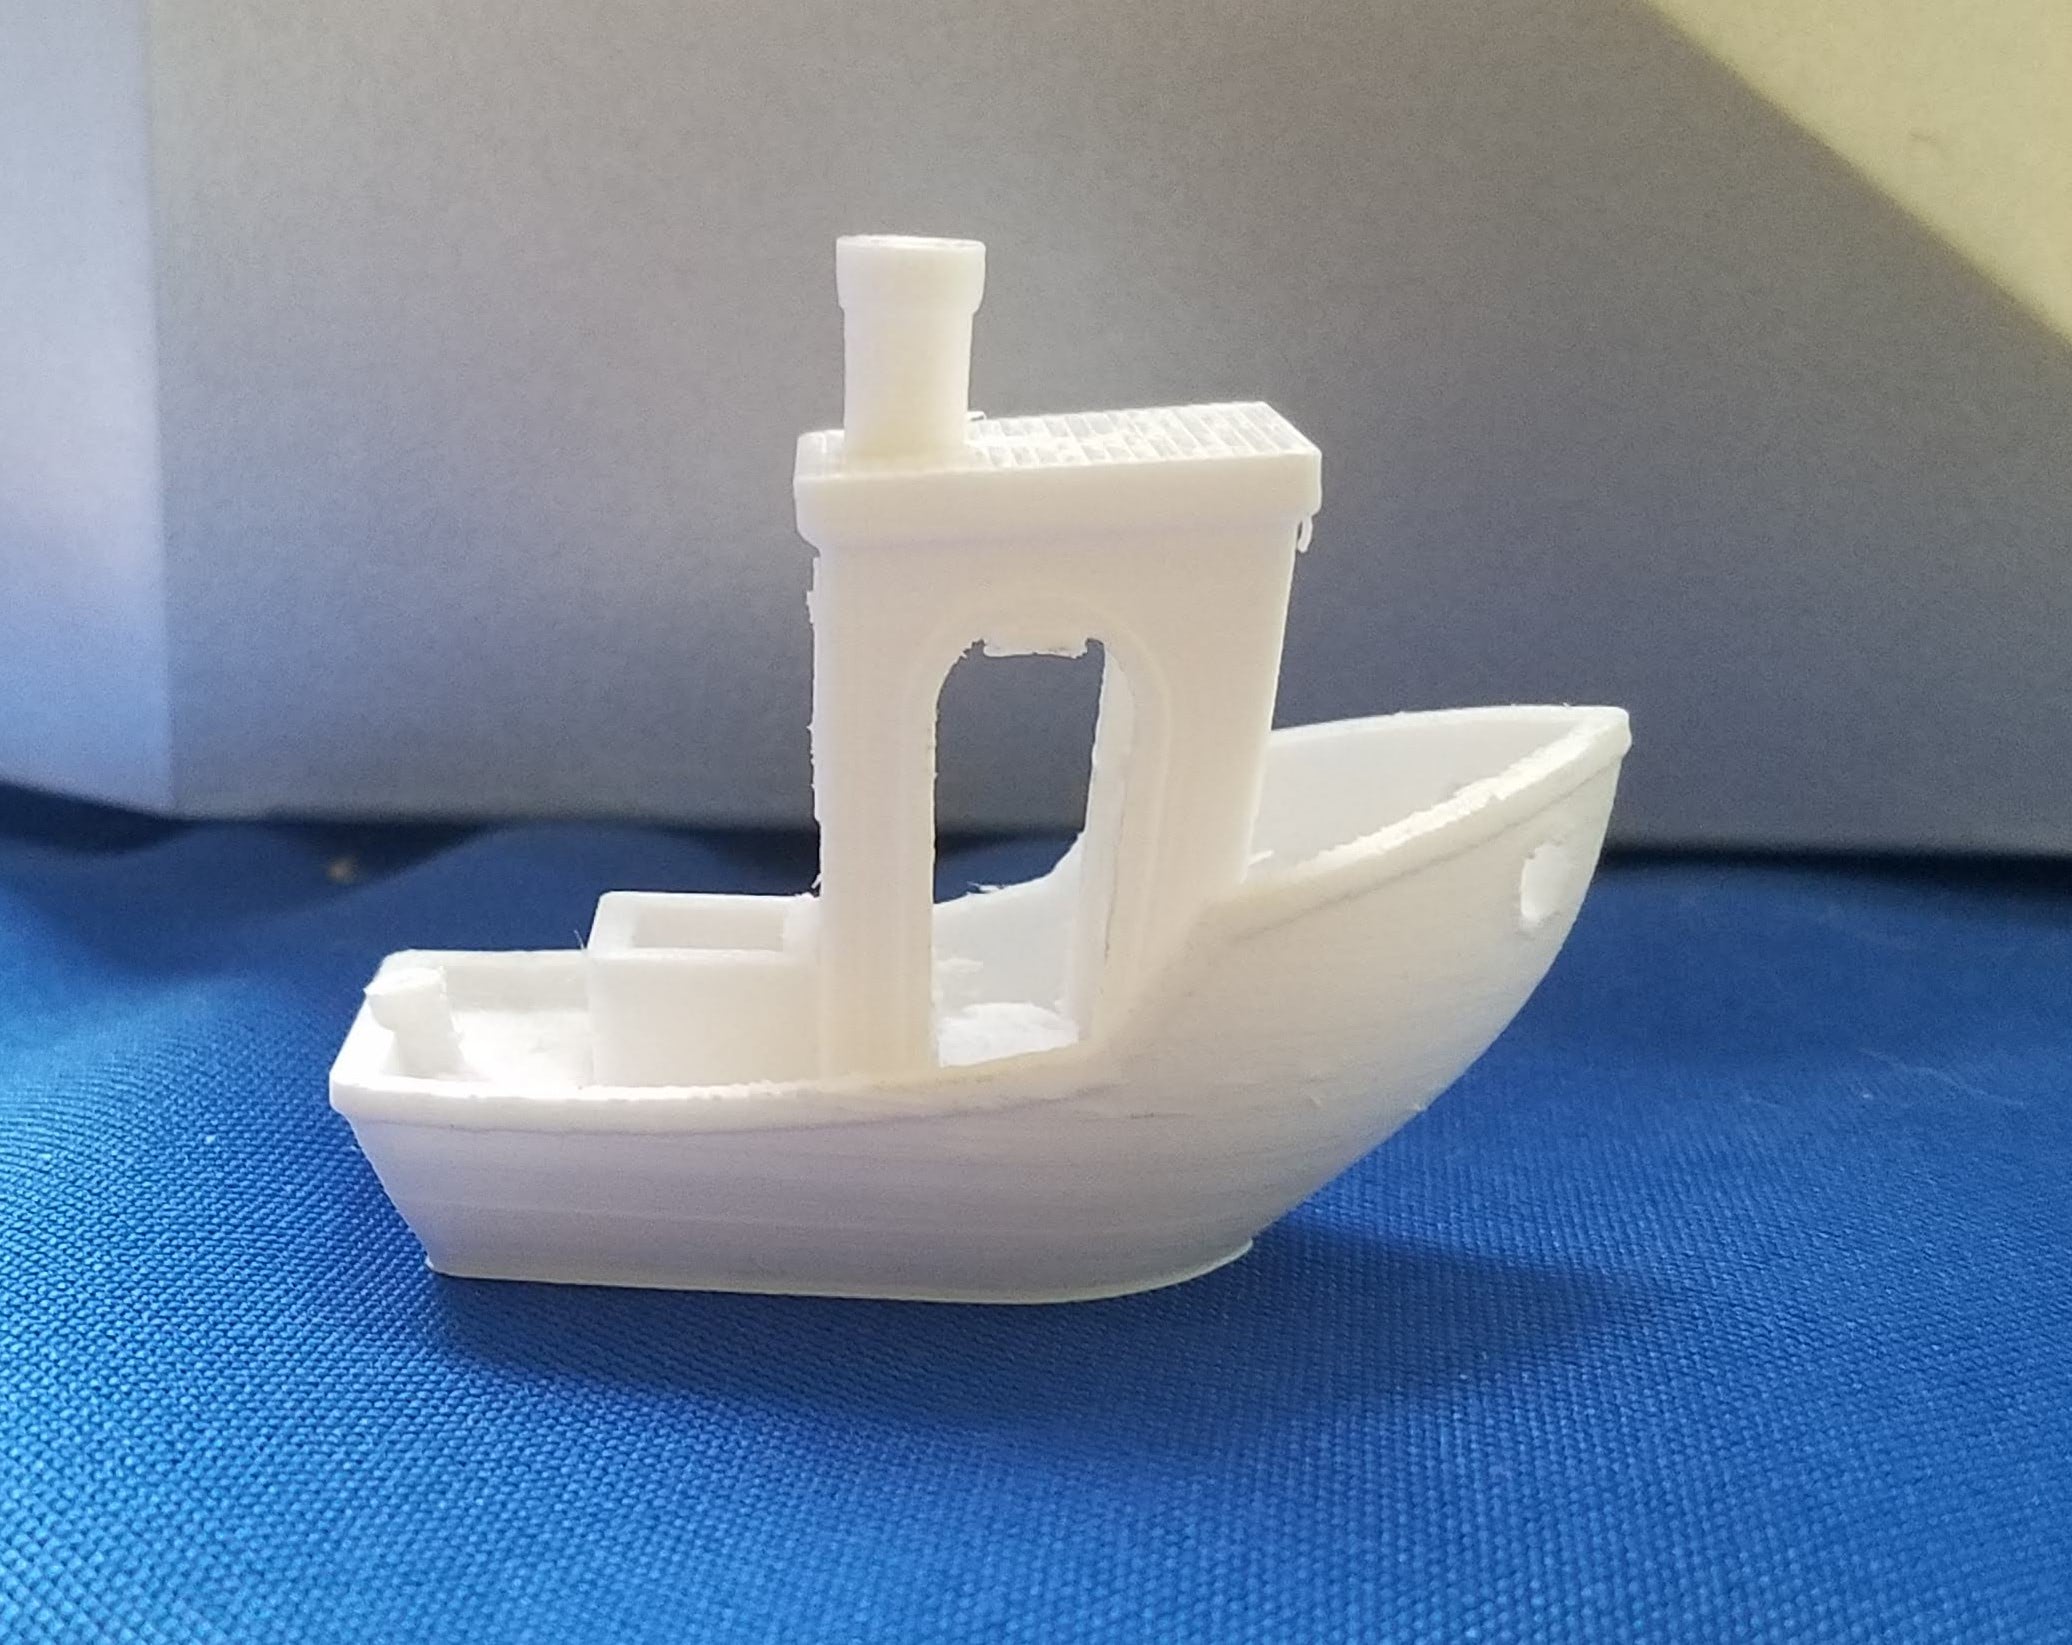
For a first print, it’s pretty good; some users would be pleased while others might feel a bit disappointed with what they believe is the best quality the machine can produce. That’s certainly not the best the 3D40 Flex can do, though. Supports weren’t needed for this print, but some of the print settings were causing the supports to merge with the print, making them impossible to fully remove. Beyond that, there are minor inconsistencies in the layers that I attribute to motion backlash and not enough cooling, both of which are easily addressed by slowing the print speeds. Some stringing and the merging of the support pillars with the part indicate that the temperature might be a bit high, and some dotting told me that more retraction was needed.
The Adjustments
It is a misconception that layer height is the primary driver of 3D print quality. While it does increase Z resolution and surface appearance, there are several other print settings that need to be correctly configured in order to realize the quality improvements gained by using lower layer heights. To demonstrate that claim, I increased the layer height to the Medium Quality 0.2mm/200 micron setting and lowered the print speed from 50 to 35; I also lowered the extrusion temperature from 220 to 218, decreased the flow rate from 100% to 99.5%, and increased the retraction distance from 2mm to 2.5mm. Support was disabled as well. These are all very minor adjustments. Here is the result:
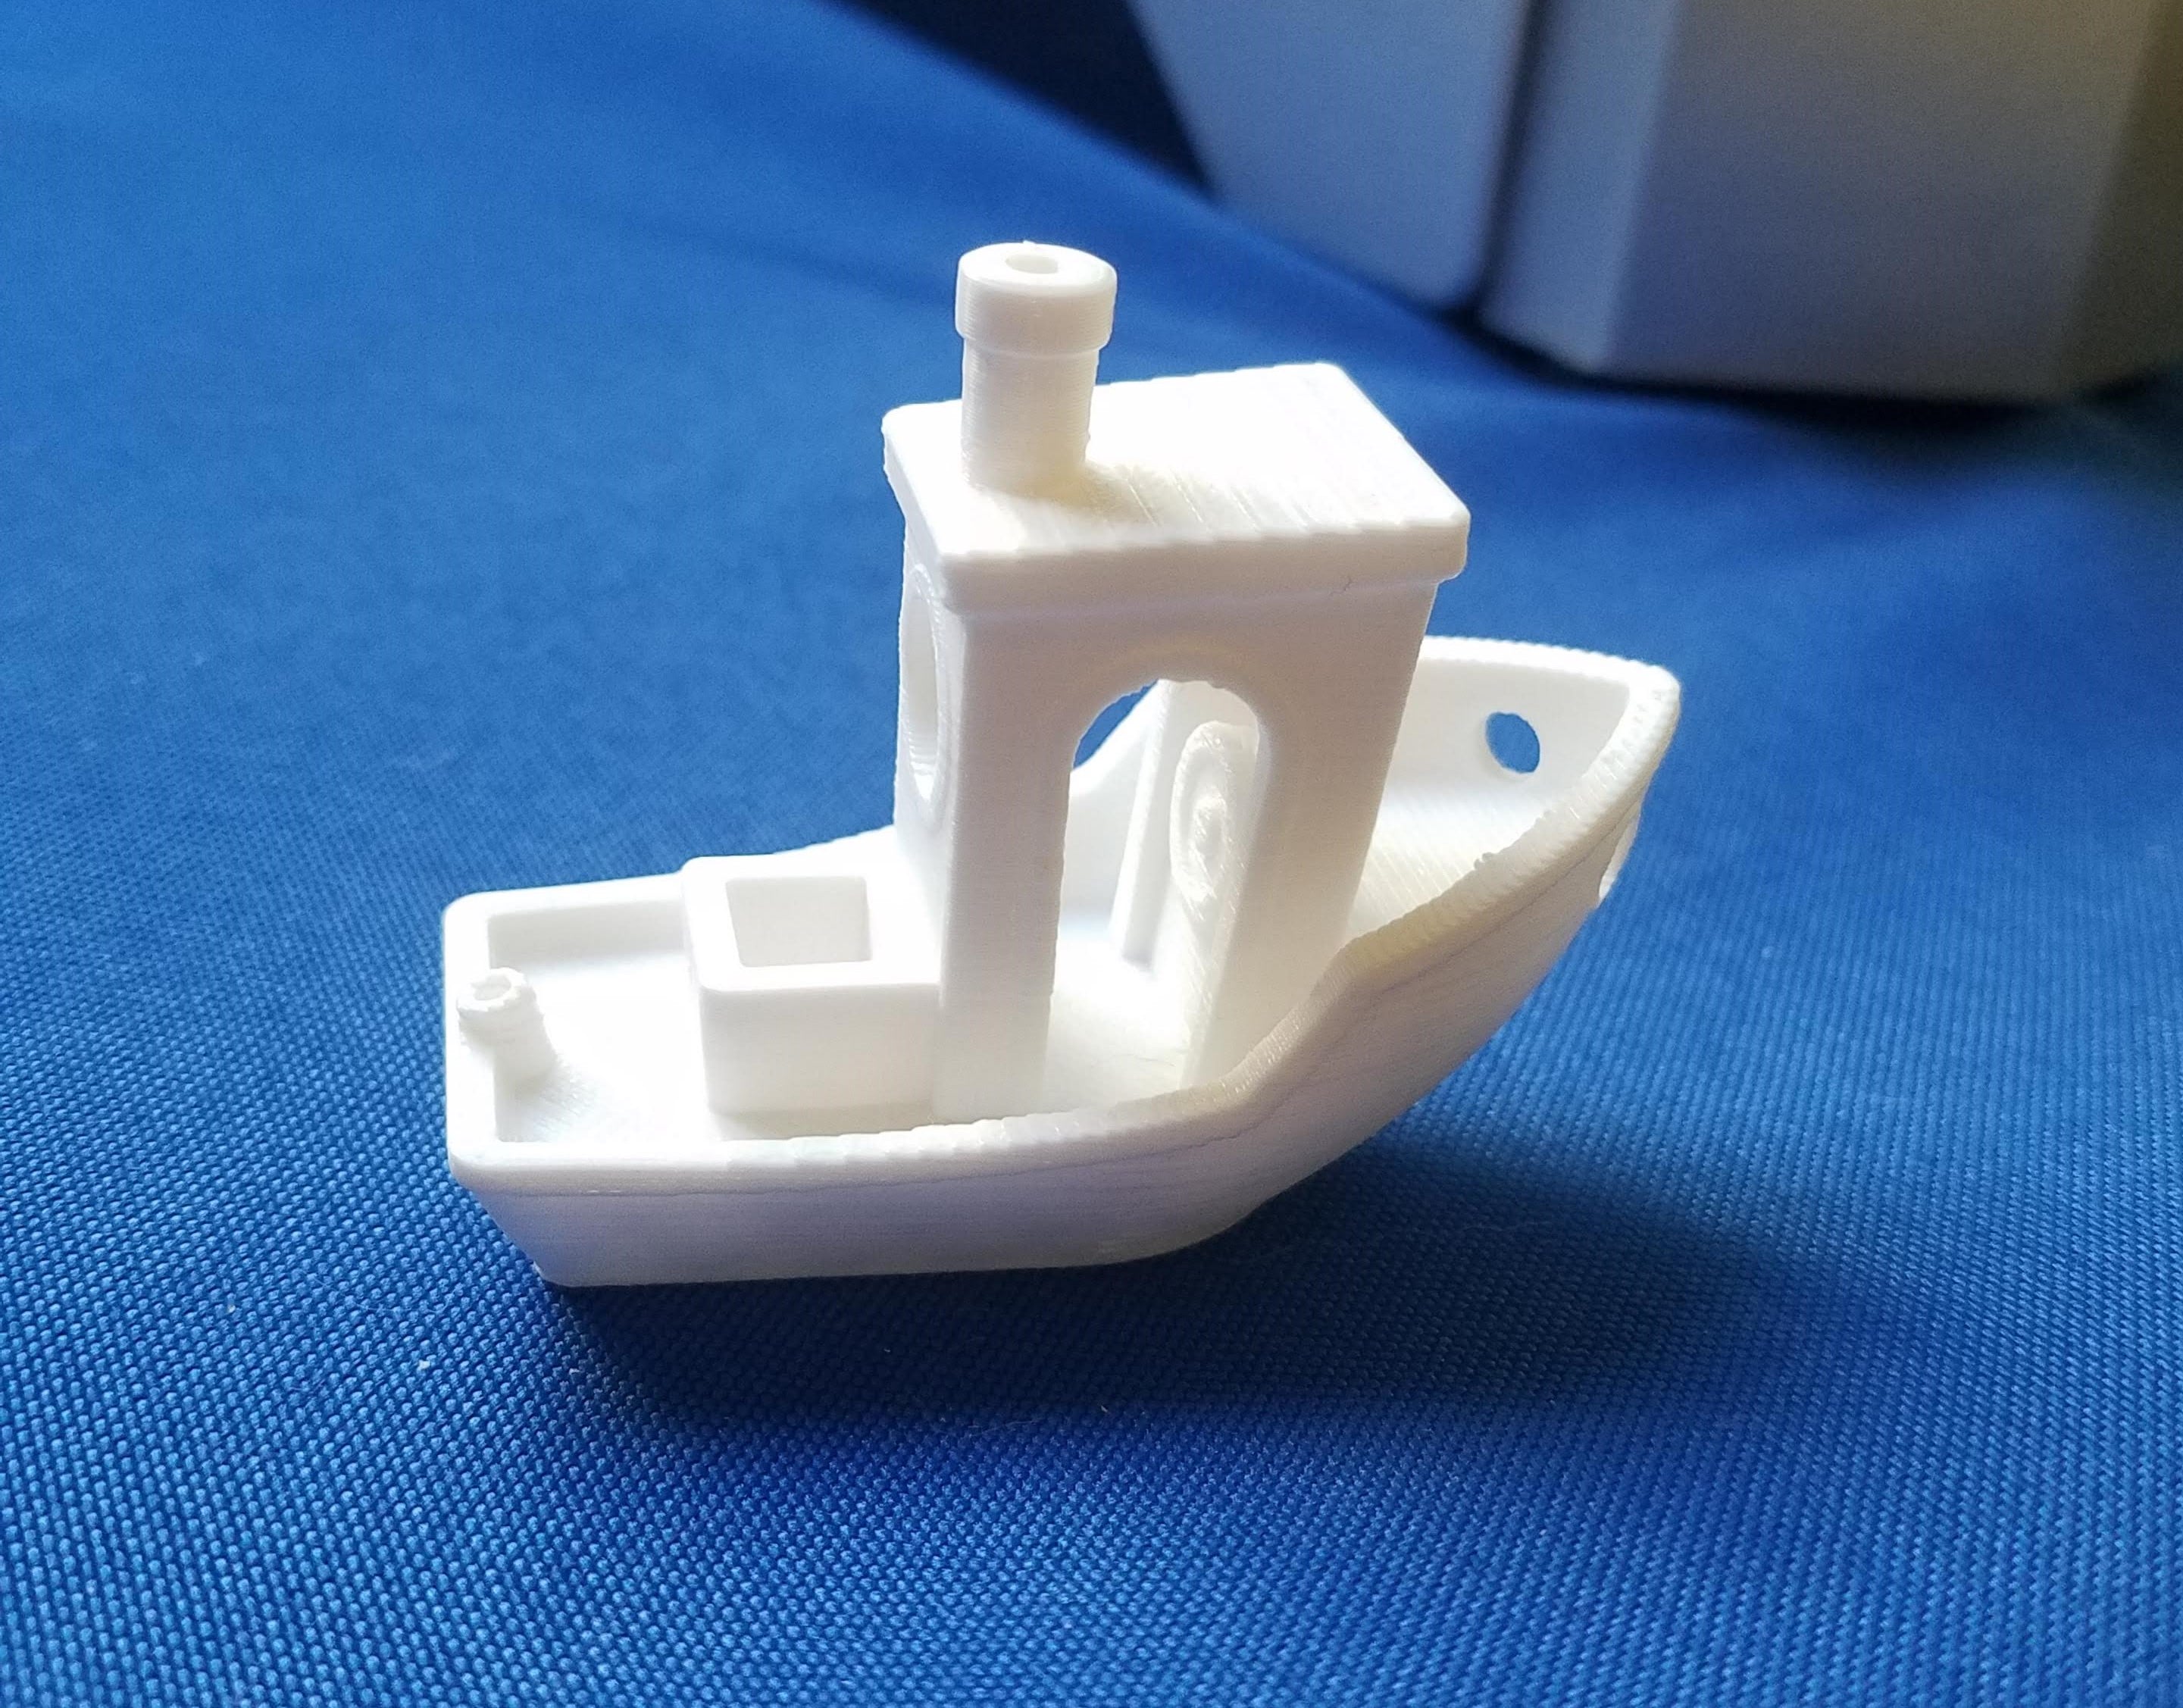
By nearly every objective measure, the “Medium Quality” print is superior to the “High Quality” print. The only way the HQ print outshines the MQ print is that it has less layer stepping, which is hard to notice past its other faults. I could speculate about why the Dremel engineers are setting the print speeds of the profiles too high, but that’s not the point of this review.
The Tests
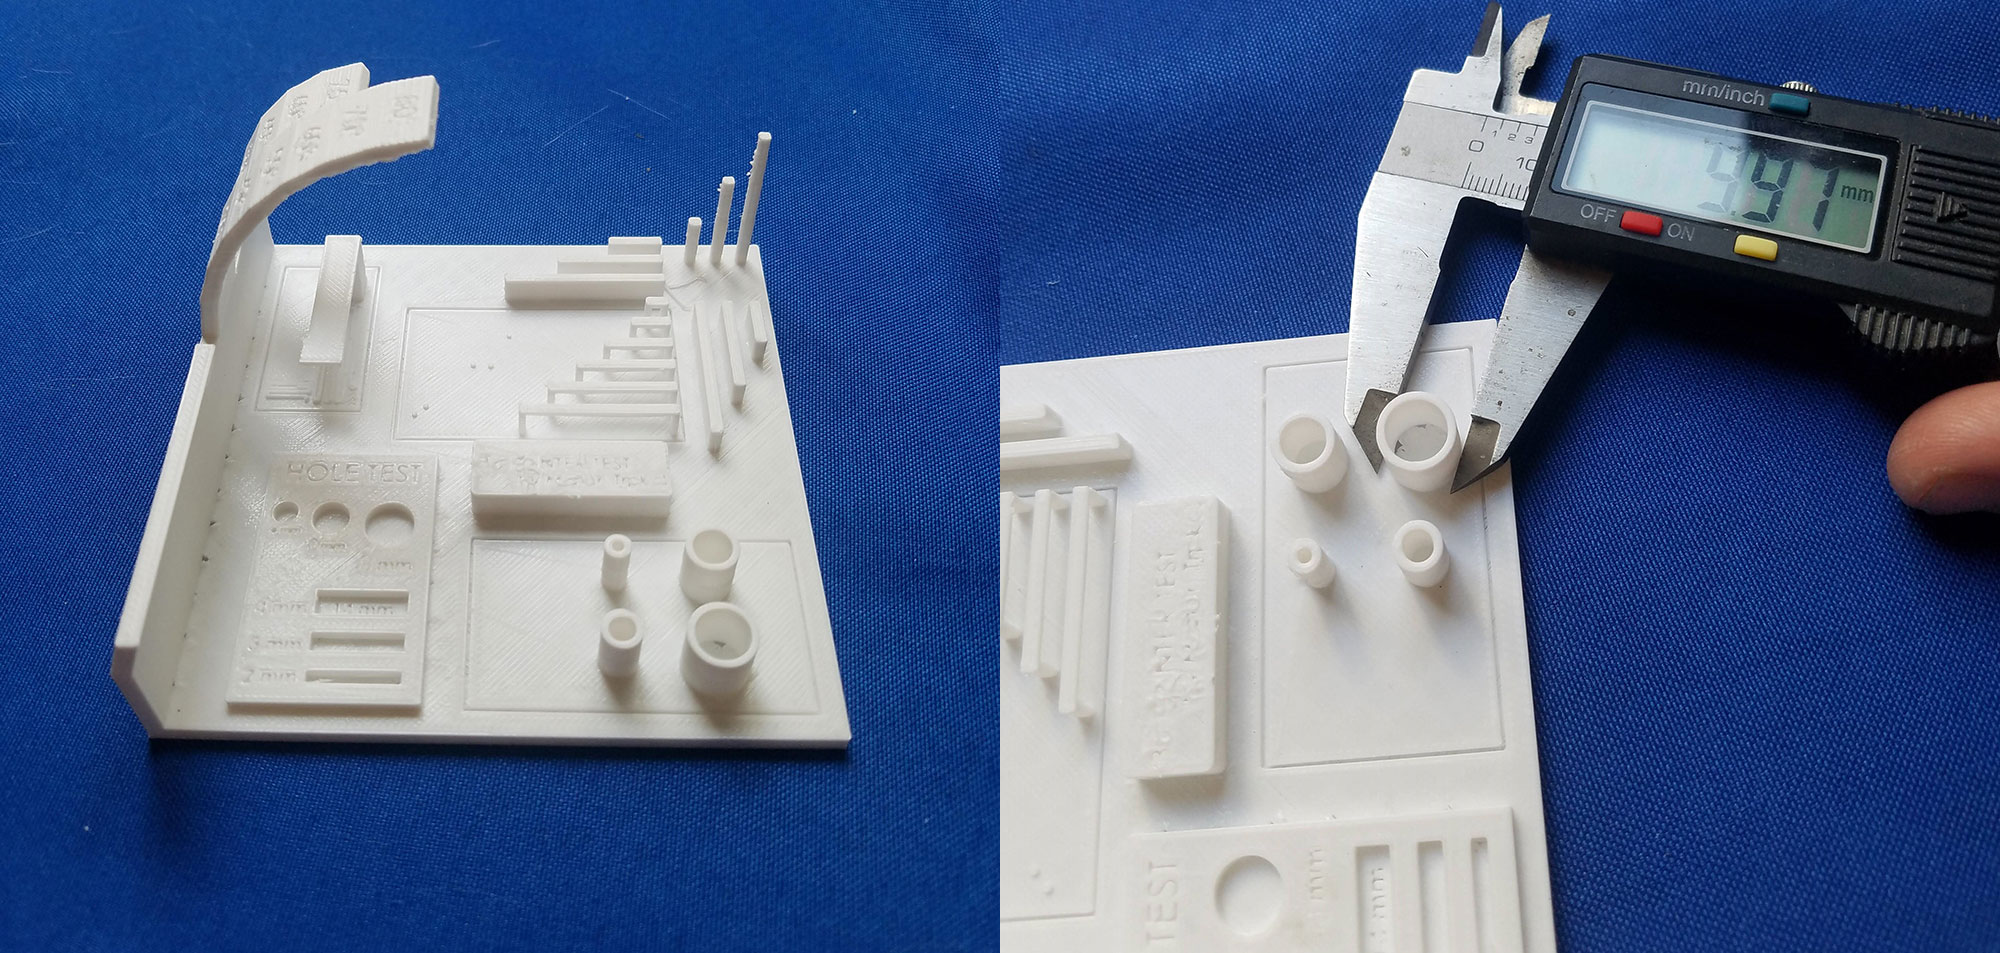
To assess the various capabilities of the machine, I printed several objects of varying geometries that are known to test the limits of FDM 3D printing. I used the same print settings for all of them. First off was the All in One 3D Printer test that tests supports, overhang, holes, dimensionality, and bridging.

It performed well in most metrics, with successful overhangs achieved at 75° and 80°. Bridging was excellent with no sag on the longest gap. The support area did well but I accidentally broke a small wall when removing them. The circles are very close to spec, with the 10mm pillar measuring 9.93mm to 9.97mm. There’s some slight dotting on the thin, tall features, but that’s to be expected.
Next, I printed three different animal sculptures all at once:
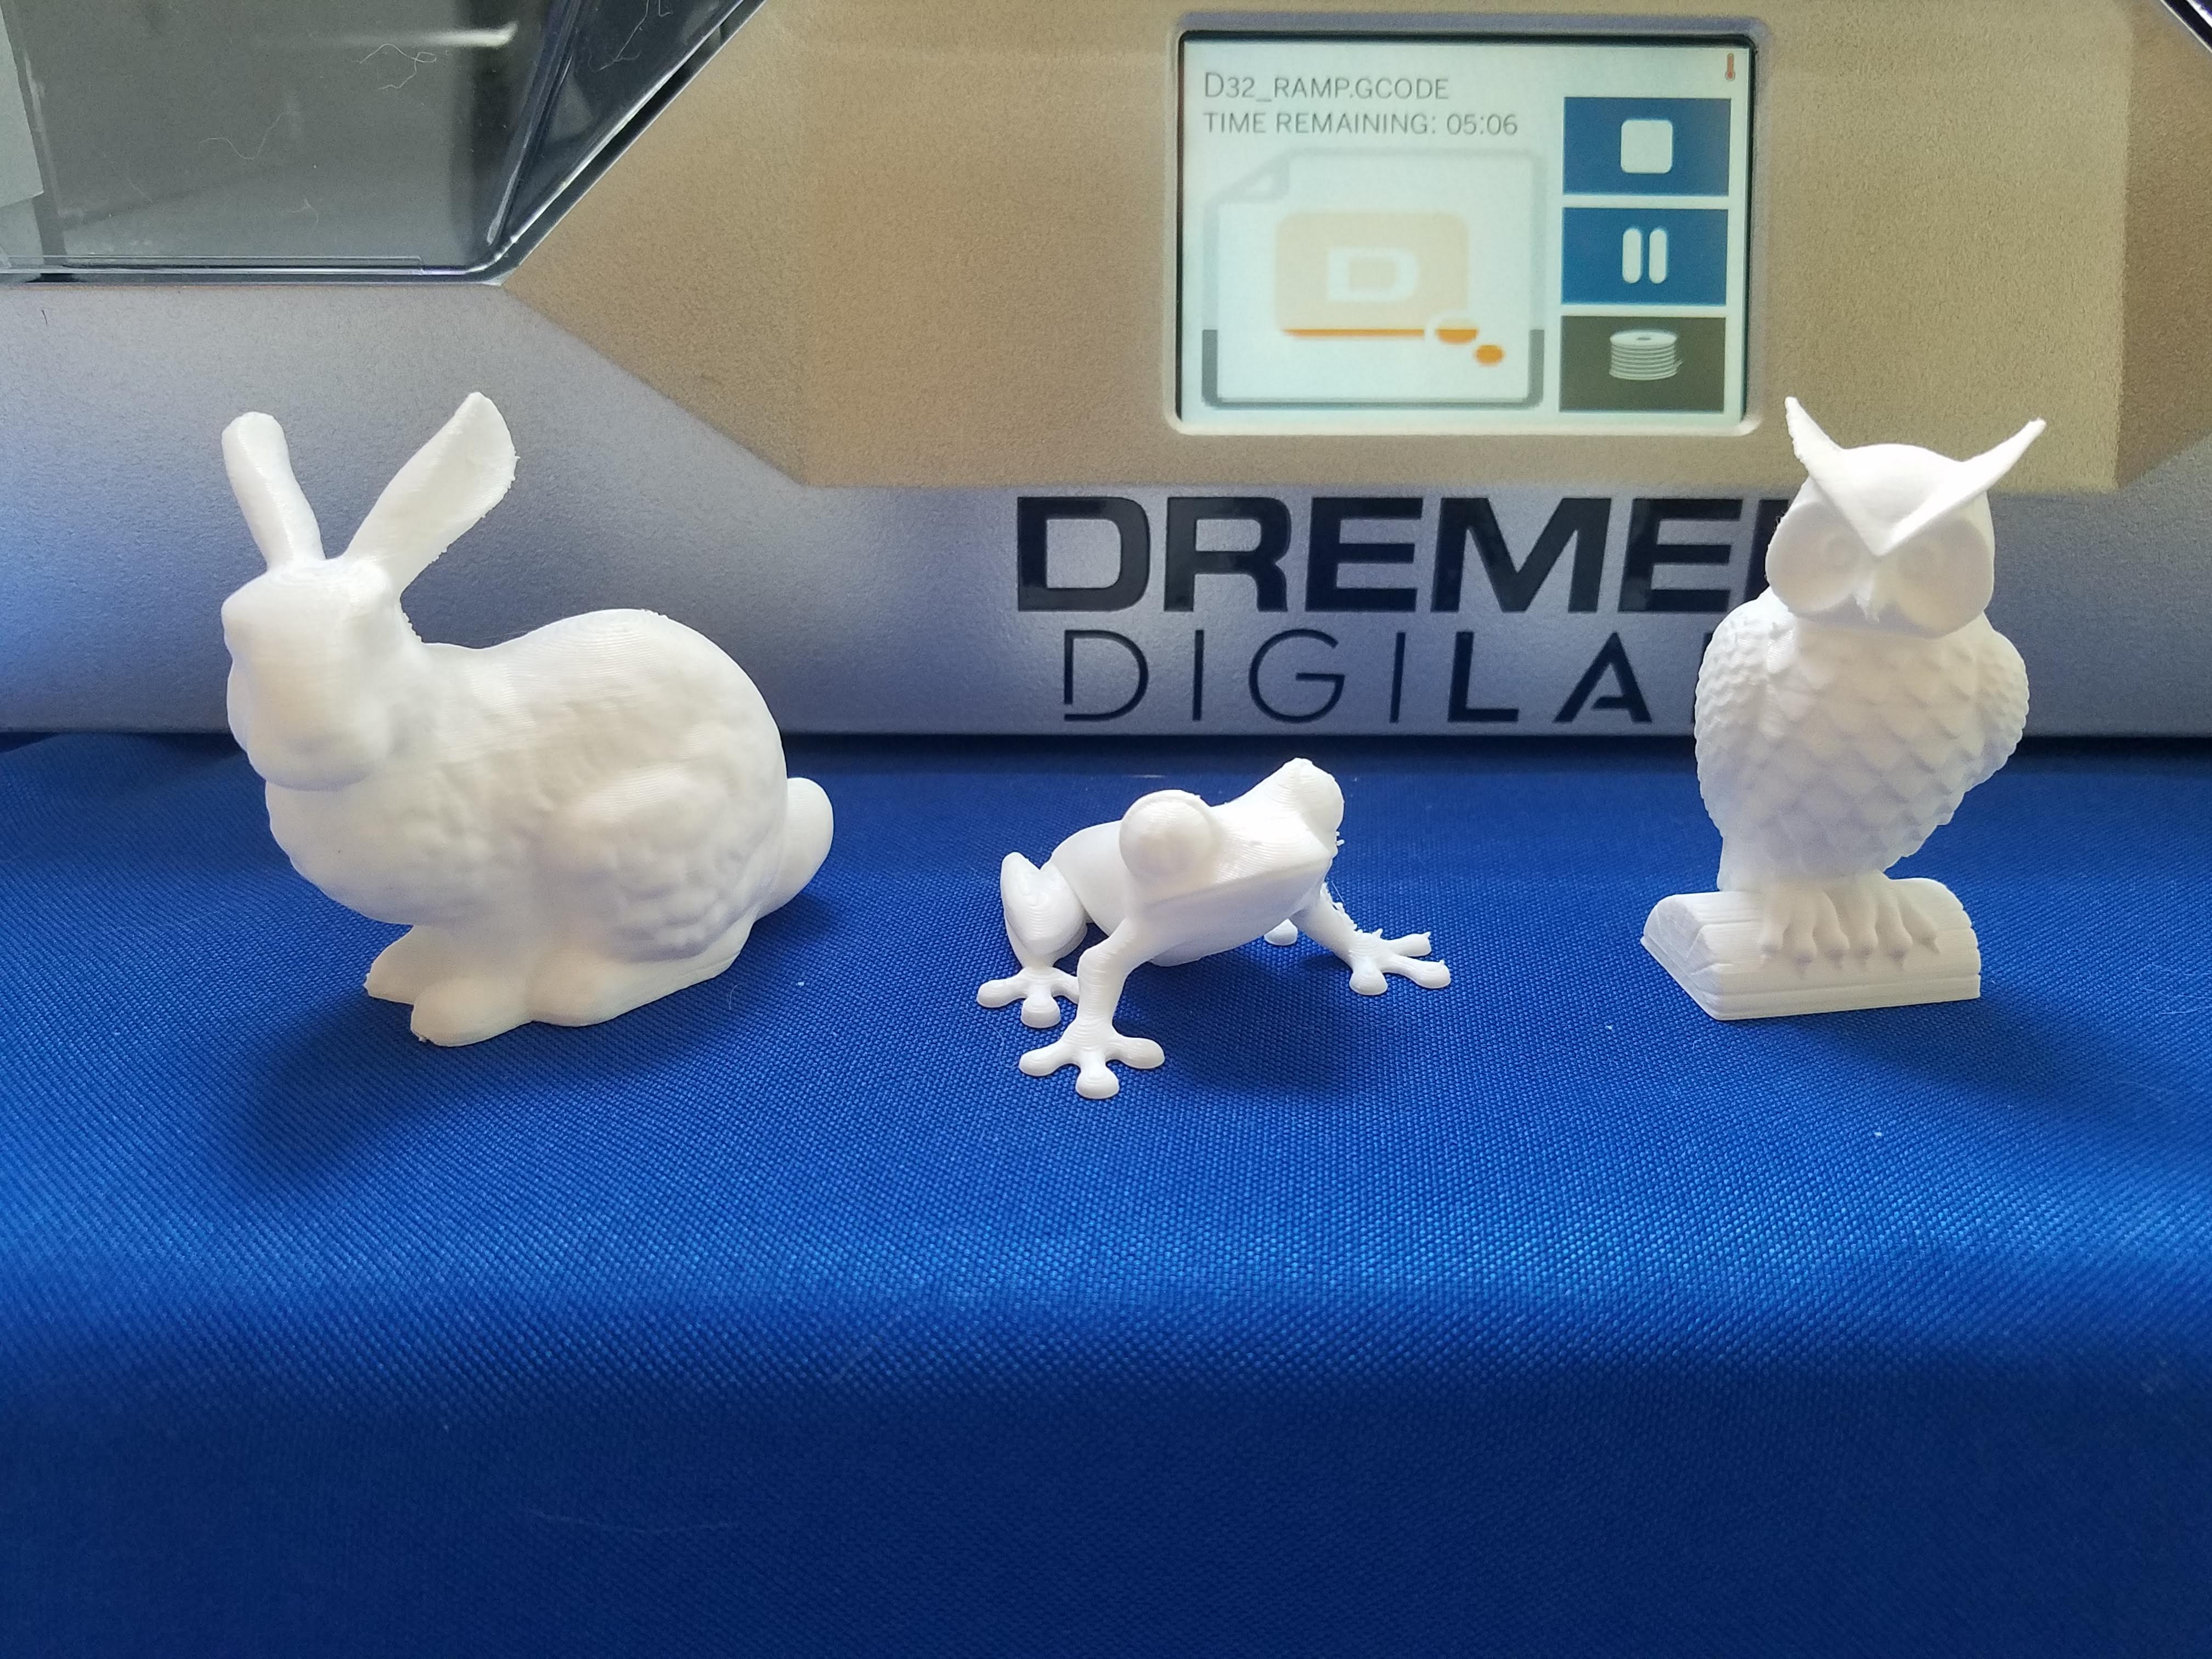
They all came out great. Both the Stanford Bunny and the Tree Frog test extreme overhang and had no issues. The Owl tests a printer’s wisdom and the 3D40 Flex gets high marks. There’s some dotting on the frog that can be easily removed, but I left it for journalistic transparency; increasing retraction a little more would likely help.
I then wanted to test moving parts that are assembled after printing as well as moving parts that are printed all together. The C-clamp fulfilled the former and the Fidget Spinner the latter.
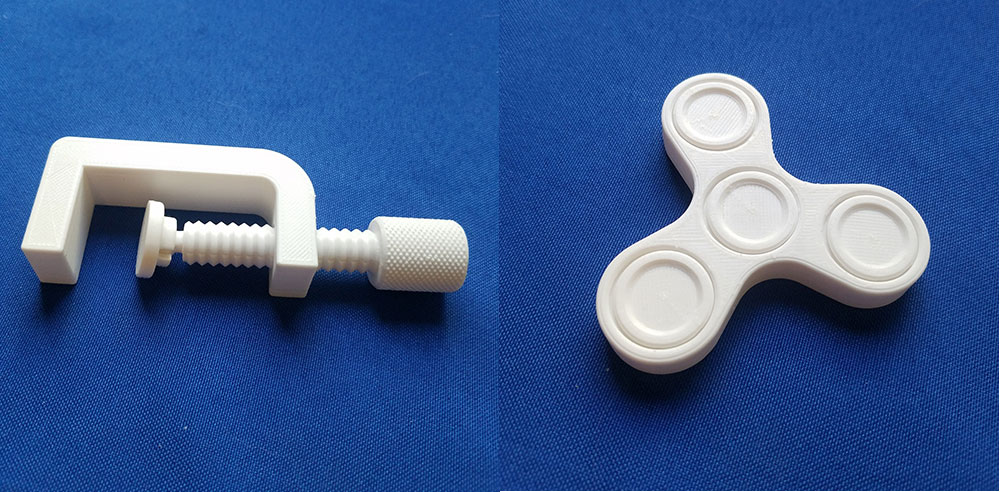
The Fidget Spinner spins freely and the C-clamp functions just as it should. Dremel is using high-temp PLA so the parts are all rather strong.
Everything I printed looks and feels nice, so I moved on to the other colors they sent: black and blue. Naturally, I had to print the 3DPrinting.com keychain we designed in our Tinkercad VS Fusion360 tutorial.
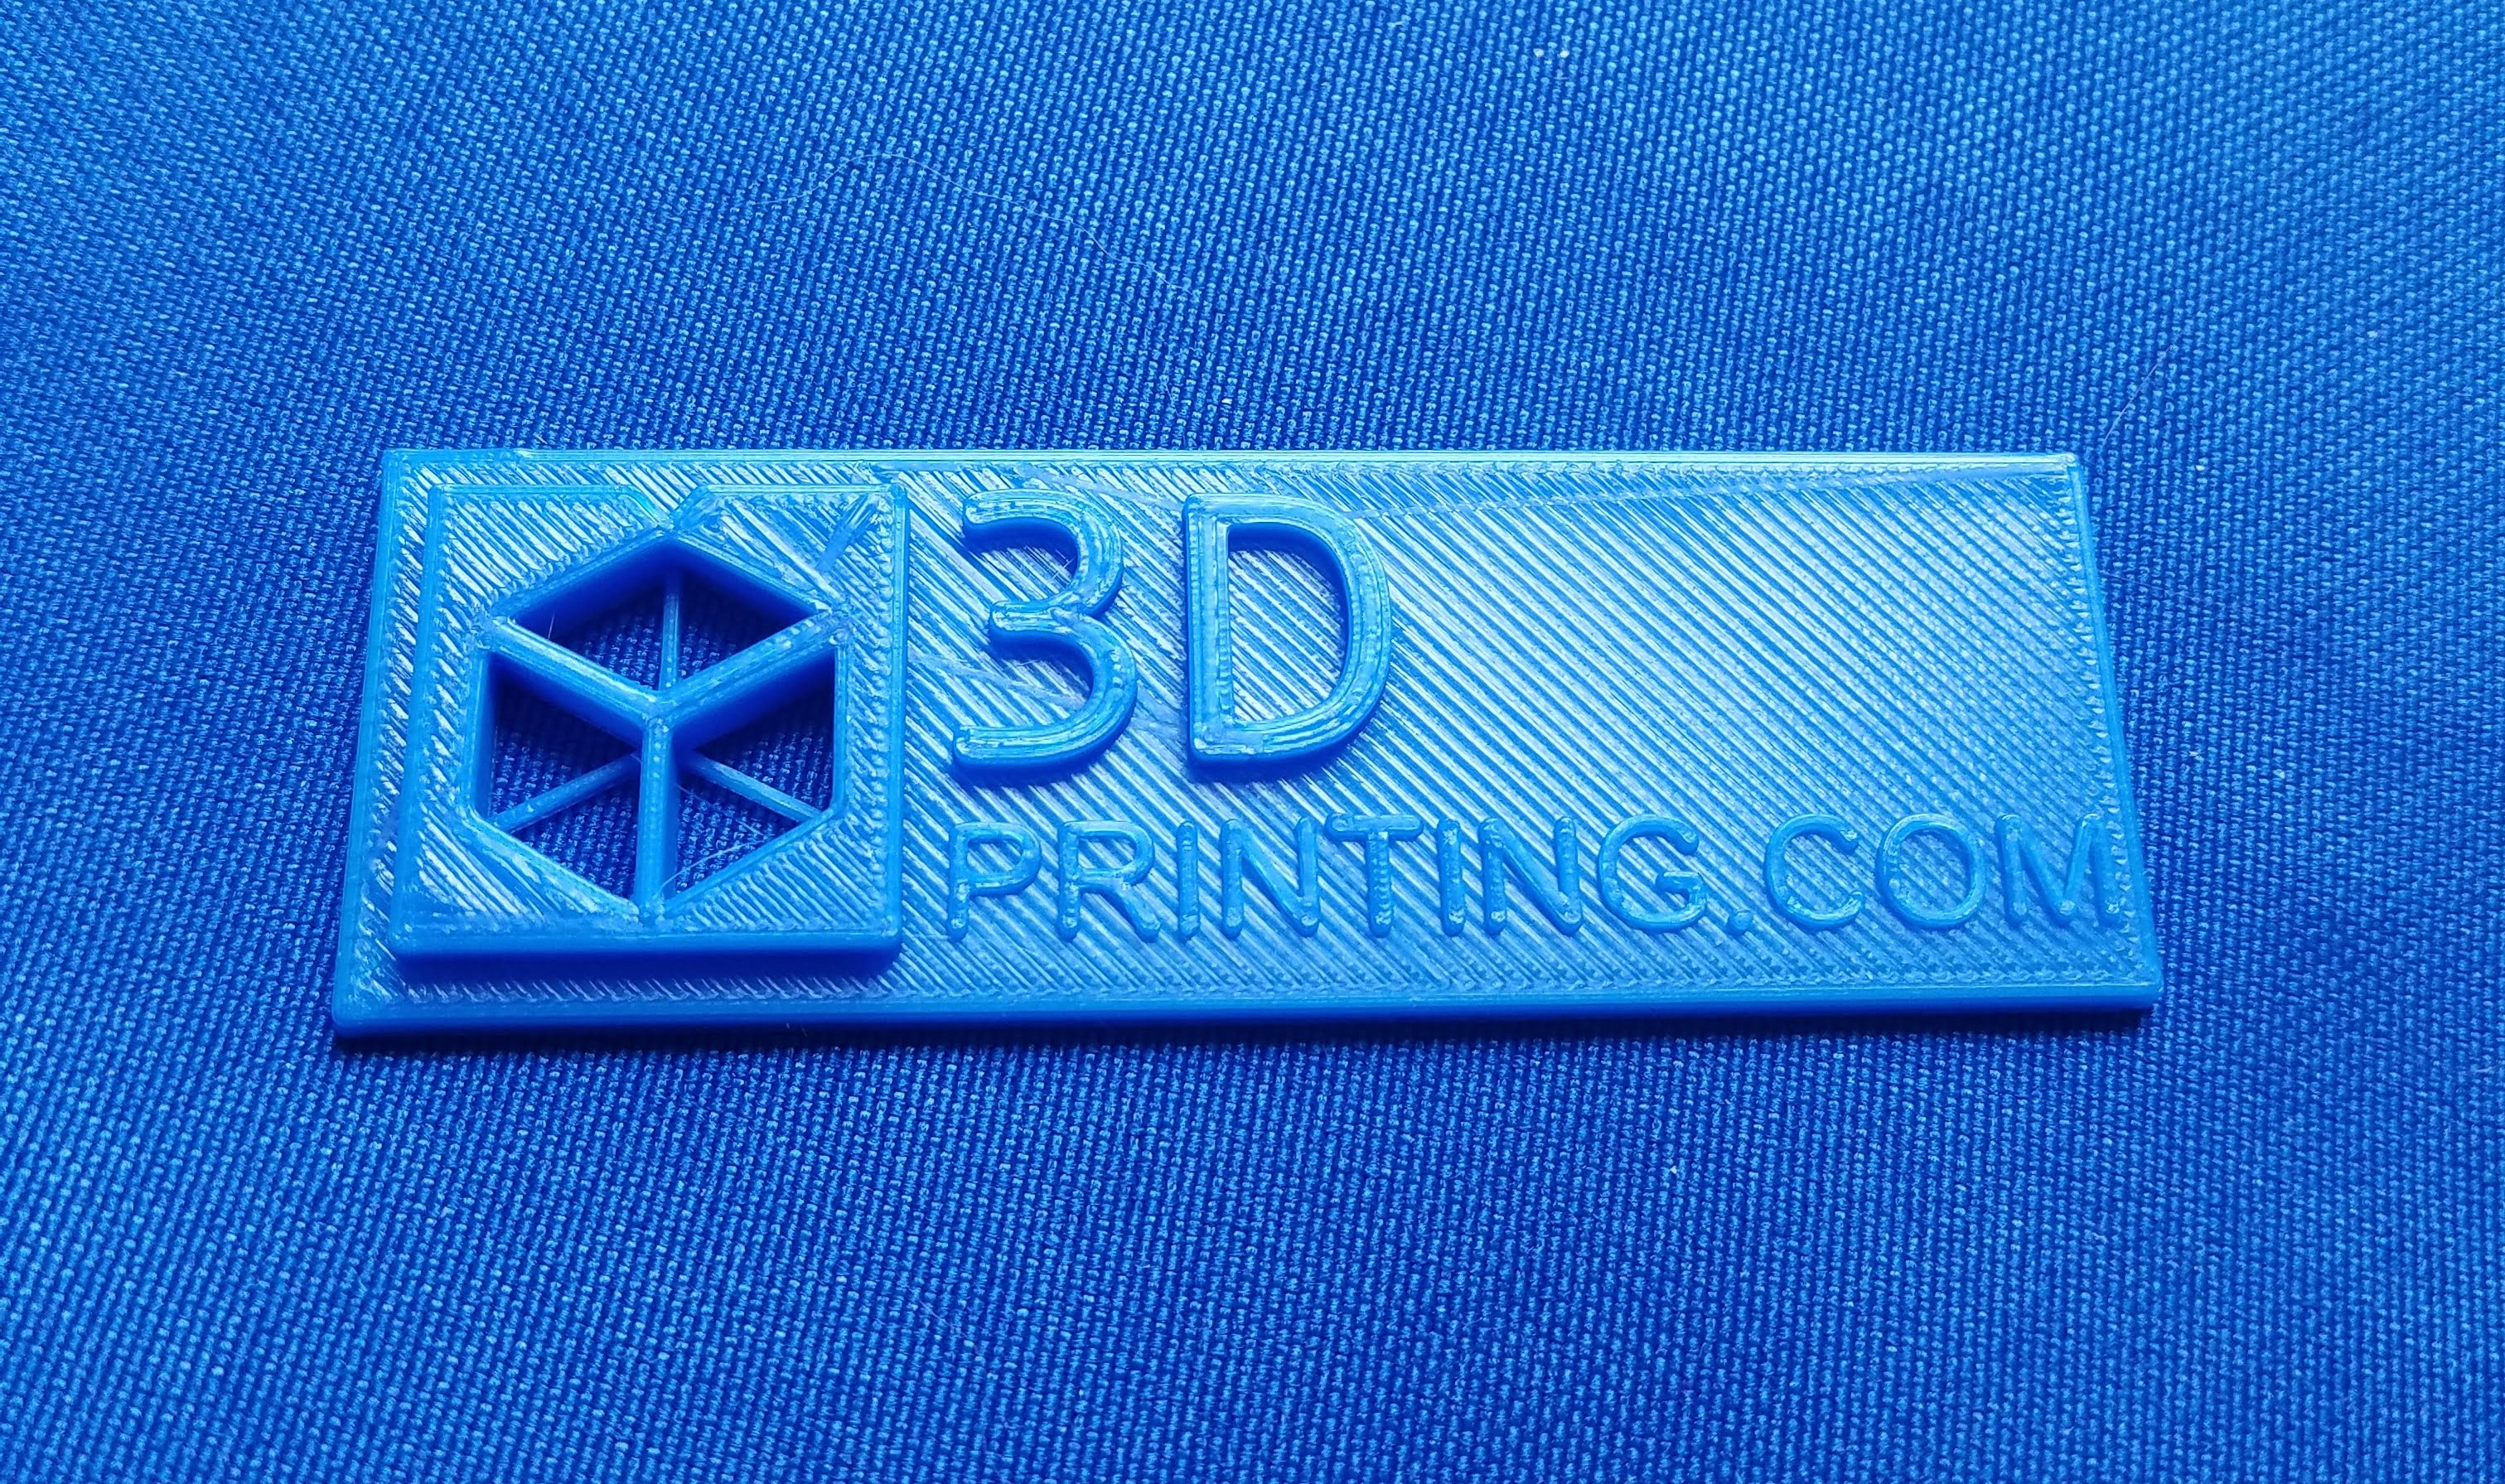
I’ll be the first to admit that it looks better than the one I printed on my TAZ, so kudos to Dremel. The single-line text is phenomenal.
I keep my TAZ in the garage for two reasons: because it’s loud and because cats. But the 3D40 Flex is not loud as it’s fully enclosed, and because it’s fully enclosed, I don’t have to worry about my cats being tempted to play with the twitching filament. But my cats were certainly intrigued with the printer so I just had to print them a toy. Here’s Moose playing with it:

I moved on to the black filament to run an endurance test. My backdoor has a small step so I printed four wedges to attach to the bottom of some plywood to make a ramp for my wheelchair. Printing two wedges at a time with 0.3mm layers, 4 perimeters, and 20% infill at 50mm/s took 8 hours, though it calculated that it would take only 7 hours and 23 minutes. Both sets printed fine, though there’s minor curling on the narrow end of the wedges that were towards the front. They’ll still function the same and some extra bed adhesion may have prevented the issue. I had my 120lb brother stand on one of the wedges and it didn’t creak, crack, or bend in any way.

Finally, I needed to test the maximum resolution of the machine, which is 50 micron layers. I chose the 3D Hubs Marvin for this test because it has a good mixture of curves and hard angles. It was printed at 25mm/s. The result:

A 50 micron layer quality is a tall order and the 3D40 Flex is up to the task. It’s not a perfect print but it is a very good print. The imperfections on the top are likely the result of cooling issues that can be solved with some settings tweaking.
My Verdict
Dremel 3D40 Flex pros
- Reliably prints with PLA with high quality
- Easy and safe to use
- Print via Wi-Fi
- Low operating sound
- Perfect for K-12 education institutions
Dremel 3D40 Flex cons
- PLA only
Overall, using this 3D printer has been a fantastic experience. Dremel has removed (most of) the guesswork out of 3D printing, making the process fun and intuitive. After the first couple prints, I never worried that a print was going to fail. The only problem that I experienced was when I changed from white to blue filament, the filament wound around the spool holder during the loading process without my noticing; this caused tension on the extruder that led to one print failure. Likely, it was user error. The enclosed build chamber makes the machine more consistent (due to temperature stability), quieter, and safer (around children and pets). It’s quiet enough to have a normal conversation right beside it.
The magnetic build plate is also a major upgrade. Not only does it make removing parts easier but it also preserves the calibration of the bed; on most 3D printers, parts have to be removed from the bed with spatulas, sometimes with great force that can shake the whole printer and affect levelness. The 3D40 Flex’ removable bed protects the machine from all of that jarring part removal. The flexible bed has a replaceable layer on top that helps parts stick during printing and come off easily afterwards, and a replacement sheet is included. Dremel let us know that these sheets typically last 50+ prints, similar to BuildTak sheets. So they will last a while if they don’t get marred and scratched by the included spatula, so be careful.
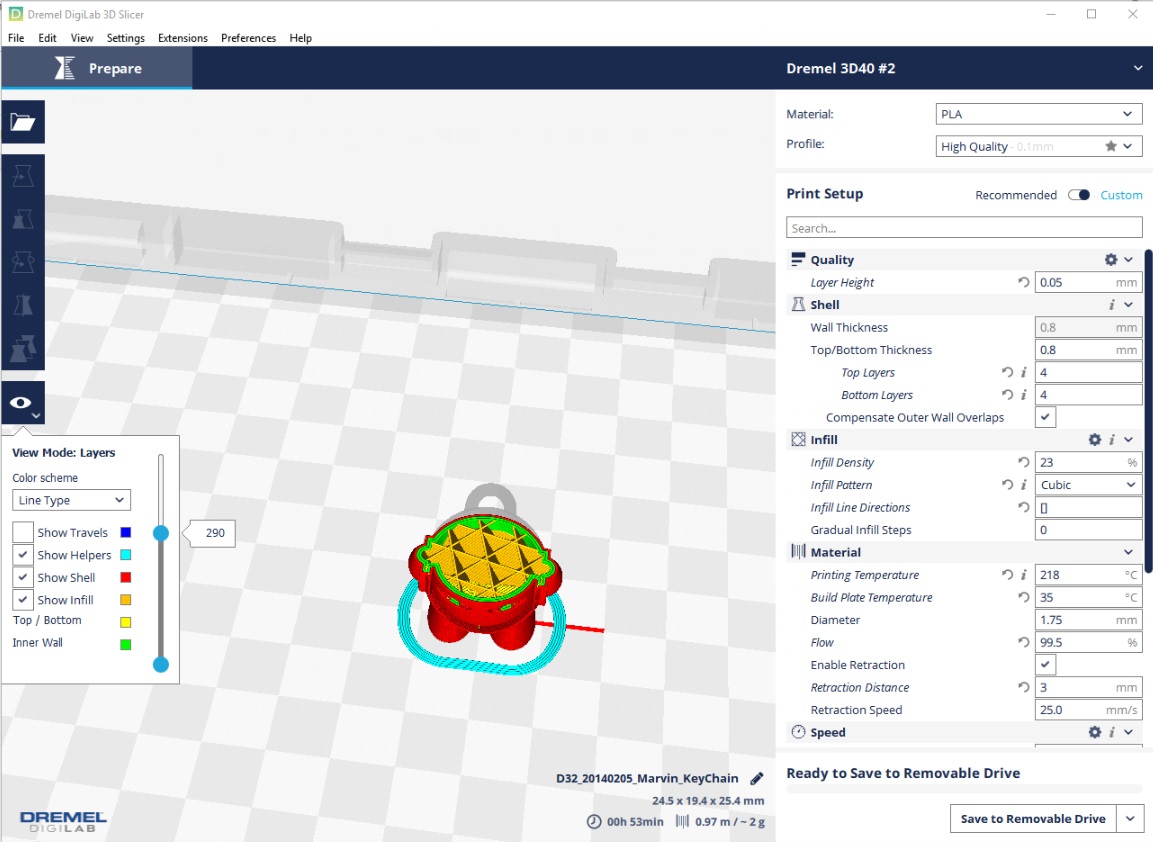
DigiLab 3D Slicer is a custom version of Cura and Cura is an amazing slicer. This was a smart decision on Dremel’s part to defer to the experts. The software allows users to select which slice parameters to display on the Print Setup screen, so users are not at all locked down by simplistic controls as it’s all there under the hood to tinker with, from Z seam alignment to minimum infill area and everything in between. The Layers View Mode is especially helpful when slicing complex objects. There’s also a Pause feature, which I tested and it works, albeit with some stringing.
If you only print with Dremel PLA, the cost of operation is a little bit high; Their 0.5kg spools of filament cost more than third-party filament. But, the Dremel 3D printers allow to use 3rd party filament, they updated their warranty policy last year to reflects this.